 If you’ve been paying attention to the Away3D blog, you probably already know that the 4.1 alpha has been released today, which has been my main fixation since September (when I wasn’t getting radiation poisoning). As mentioned in the release post, one of the new features is “multipass shading”. If you’re not into 3D rendering programming, you may be asking yourself: “¿Qué?”, so I would like to go a bit more in-depth into the whats, whys, and hows.
Multi-pass shading
Multipass rendering is simply executing different render calls (“passes”) for a single geometry. Strictly speaking, Away3D 4.0 has supported multiple passes since its inception; SubSurfaceScatteringDiffuseMethod caused a depth map pass to be added, and OutlineMethod introduces a new pass to render the outline seperately from the normal geometry. However, all lighting – and methods contributing to the colour of the final output pixel such as fog, rim lighting, etc – happened in a single pass. With shaders being limited in number of instructions and amount of registers, so are the amount of lights that can affect a surface as well as the complexity of any other piece of code, shadow mapping being a common victim. This is where 4.1 introduces multiple passes (hence multi-pass shading) in the form of TextureMultiPassMaterial and ColorMultiPassMaterial. For all intents and purposes, they work identical to their single-pass counterparts (TextureMaterial and ColorMaterial, respectively), but they automatically split up into different passes depending on the amount of lights and the use of shadow mapping. The results are blended together to form a correctly shaded surface. This way, there’s no strict upper limit for lights. Of course, drawing the geometry multiple times comes with its own cost, and you should take care not to go gung-ho just because you can!
Cascade Shadow Mapping
Having shadows in a separate pass greatly increases what you can do to increase shadow quality. Getting shadows to look great is always a bit of a challenge, and one of the techniques that’s popular is Cascaded Shadow Maps (a great explanation here). If you’re too lazy to read the msdn article, here’s the gist of it. Due to perspective projection, fragments close to the viewer generally suffer shadow aliasing, because a texel in the shadow map covers much more screen space closer to the camera than it does farther away. In fact, for distant fragments, the shadow map resolution is often too large since several shadow map texels map to the same screen fragment. So there’s not enough resolution in the front, and possibly too much in the back! Cascaded Shadow Maps try to solve this by splitting up the view frustum and rendering separate shadow maps for each segment. The closer to the viewer, the smaller the frustum segment should be so as to increase the projected resolution of the shadow map.
CSM in Away3D 4.1
As you’ll see in demo code, it’s pretty easy to get this technique to work. Just be sure to use a multi-pass material and assign CascadeShadowMapper to the light and a CascadeShadowMapMethod to the material (this is identical to how NearDirectionalShadowMapper and NearFieldShadowMapMethod work).
cascadeShadowMapper = new CascadeShadowMapper(3);
cascadeShadowMapper.lightOffset = 10000;
directionalLight = new DirectionalLight(-1, -15, 1);
directionalLight.shadowMapper = _cascadeShadowMapper;
scene.addChild(_directionalLight);
multiMaterial = new TextureMultiPassMaterial(texture);
multiMaterial.lightPicker = new StaticLightPicker([light]);
// you can also use HardShadowMapMethod, SoftShadowMapMethod, DitheredShadowMapMethod as base method
baseShadowMethod = new FilteredShadowMapMethod(light);
multiMaterial.shadowMapMethod = new CascadeShadowMapMethod(baseShadowMethod);
Away3D splits up the view frustum automatically, but it’s often a good idea to play around with different split ratios yourself. The values with the best results depend heavily on the scene, how close you allow the camera to get to shaded surfaces, and so on. This is done by simply specifying the ratio in the view frustum for each cascade level to reach, “0” being the frustum’s near plane, “1” being the far plane. Generally, you’ll want the last cascade level to reach to the far plane, thus passing “1”.
For example, when using 4 cascade levels, you could specify the splits as follows:
cascadeShadowMapper.setSplitRatio(1, .2);
cascadeShadowMapper.setSplitRatio(2, .4);
cascadeShadowMapper.setSplitRatio(3, 1.0);
A small detail to note: because texture memory is a precious resource, Away3D internally only uses a single texture for all (up to 4) shadow maps.
The demo and source
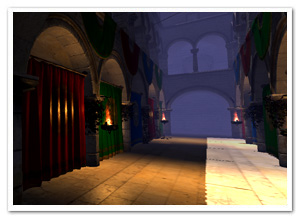
The demo that was built to demonstrate the multi-pass materials features the Sponza model built and made available by Crytek. You can find the original at their download site. It’s a bit of a behemoth, so give it some time to load ;) It allows you to play around with some of the shadow map settings, which should be pretty straightforward. At least, they will be when I get around to writing an upcoming blog post about shadow map filter types. Source for the demo can be found on Github.
If you were at my presentation at Reasons to be Creative (what were you doing, missing out on the great weather outside!) you may recognize the set-up. It’s the same as I used for the deferred rendering demo; however, this is not deferred rendering: we merely re-purposed the demo :)
Get the Away3D 4.1 alpha version in the dev branch on Github.


Superb
Great work!
Do you have a plan of Variance Shadow Mapping?
hi
thank you for all these great blogposts.
your blog has been a very usefull ressource for learning away3d ever since i got here.
keep up your good work